
Scan Report Database Instructions and Training
The following instructions
will document the process of entering scan data into the “Scan Report
Database.” The database is located on the Internet at through http://intranet.kingsmedical.com. While the database was designed with
simplicity and ease of use in mind, questions and concerns may still
arise. If you have any questions
regarding the operation of your computer or use of the “Scan Report Database”,
please do not hesitate to contact ITSupport@kingsmedical.com or call your
King’s Medical Area Business Development Manager. Our sincere goal in this project is to
provide a practical billing alternative while at the same time facilitating a
thorough yet easy to use tool by which to enter scan data.
The computer hardware you
should have received should include unless you are using a current computer
supplied by the hospital:
·
·
One PC with a
keyboard and mouse
·
·
One 15” monitor
·
·
One 56K V.90
external modem (If your computer is not being added to a LAN)
If you have any questions or concerns, please
contact support@kingsmedical.com or King’s Medical Company at 330-653-3968 and
ask for your sites Area Business Development Manager. Also see below for
support.
Logging into the Database:
Once you have logged on to
the data.kingsmedical.com site, you should see the following display:
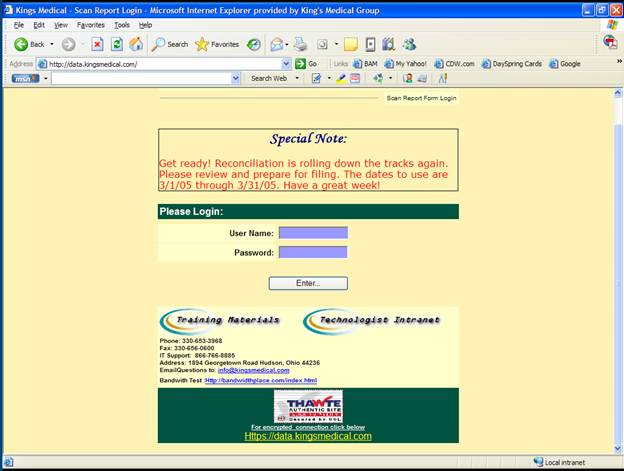
In order to have access to
the portion of the database corresponding to your hospital, Non-King’s employees must enter their “site”
username and password. Your username
and password should be included with
this training material. Simply enter the
username and password into the appropriate fields and click on the “enter”
button. Upon entering the correct
username and password, your hospital’s name should be displayed at the top of
the next page, the scan entry form. If
you receive an error message, click on the back button on your browser and
check your username and password again.
King’s
employees have the option of using the above method to get to the scan
form or they can go to their email.
At the next page enter kings/ and your personal username for your
email then your password.
This will take you to the King’s home page for the intranet. You can access your email from this page
by clicking on “Go” in the “Web Mail ” box located in the middle of the
left hand column. To access the scan
entry form, click on the “Scan Entry Form” button also located on the left side
of the page. This will direct you to the
log in page as shown in the previous illustration. Follow the directions as indicated below that
illustration to get to the scan entry form.
Entering Scan Data:
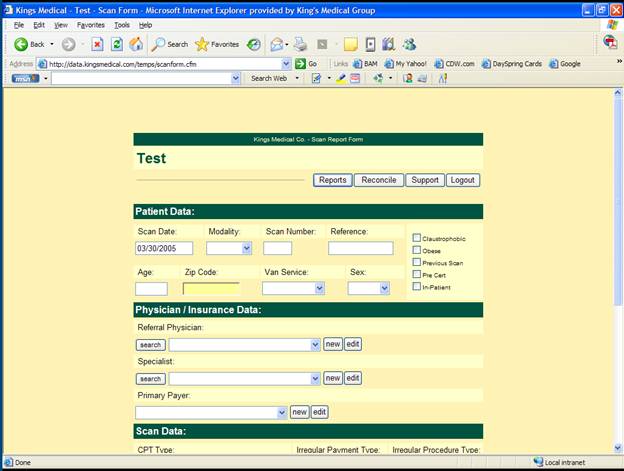
Once you have successfully entered the Scan Database, you should see a page that looks like the one above. Enter the appropriate data via the text fields or the drop-down boxes.
· Patient Data:
o
Scan Date
auto-fills with the current date – this can be changed if you need to enter a
scan for a different date. Highlight the
existing date and enter the new one. Hit
the TAB key. If the date doesn’t remain
the one you just entered, you will need to re-enter it and hit TAB again. The system is designed so that it reverts
back to today’s date just to ensure that the date you typed is the one you wish
to use. Do not proceed until the correct date appears.
o Modality – choose MR1, CT1, etc.
o Scan Number – auto-fills with next sequential number for that modality. This can be changed but you cannot use the same number twice on the same day for the same modality.
o Reference – This is for you to be able to identify the patient. For the patient ID number use the x-ray number. DO NOT USE PATIENT’S FULL NAME or initials. (HIPPA regulations)
o Fill in the remainder of the fields as completely as possible.
· Physician / Insurance Data:
o Referral Physician: Either scroll through the entire list using the first initial of the last name or use the search boxes to search by any portion of the last and/or first name. If the name is not on the list, choose “New” and see instructions that follow to add the physician to the list.
o
Specialist:
This is only required for specific modalities. If it does not apply to the modality you use,
a message, “Does Not Apply”, will appear here.
It is a field that may be used for RT or CATH modalities.
o
Primary
Payer: A drop-down list of insurance companies. If the insurance company is not on the list,
select “New” and see instructions that follow.
If you do not have or cannot provide the payer, type or choose
“Undefined” in the text or from the drop-down list.

· Scan Data: Notice that when the Modality is chosen, the CPT types and codes change accordingly.
o CPT Type: MRI, MRA, etc.
o
No Scan Due To: If the patient was not able to be scanned, use drop-down to choose the reason.
o
“No Charge must
have Reason” field
Selecting “No Charge must have Reason” indicates a
scan took place but there is no charge for it. After clicking in the box for no
charge, you will need to click the dropdown arrow and select a reason. You will notice that when you click this
field you will not be able to select the “No Scan” field. Selecting “No Scan” indicates that a scan was
not completed and after making that choice, it is not possible to also select
“No charge must have Reason”.
o
Irregular Payment Type: This field is used ONLY if your hospital has some sort
of special tracking type arrangement. If not, this option will not show up on
your screen. Click the dropdown, and, if
your location has a tracking arrangement, a list of options will appear from
which you can make your selection.
o
Irregular Procedure Type: Click the dropdown and you can select “additional
sequence” or “limited exam”. “Additional
Sequence” should be chosen only if the patient had a scan done and another view
of that same scan has been requested.
“Limited Exam” should be selected if this is the
initial scan and only a couple of views are needed. In other words, the patient has not had a
previous scan for this part of the body.
o
CPT Code/Name, etc.: select as appropriate. Some can be left blank (modifier, series, sedated,
contrast) but other fields are required (clinical diagnosis, table time).
Select “Contrast” if you have done a scan and have used contrast.
o
When you
get to the bottom of the form, click on “Submit Scan Report” and the
information will be entered in the system.
(Note that if any essential data is missing, the form will prompt you to
complete the empty fields.)
o
You will
notice another screen now appears that gives you the choices of
selections: Scan Form Same Patient or New
Scan Form.
§ If you
have another scan for the same patient, select Scan Form Same Patient. The
system will display the exact entry you just made. You now can scroll down to the CPT Type, CPT Code/Name fields and enter the proper choices for the
additional scan. You also will need to
complete the Clinical Diagnosis and Table Time. Once again, click on Submit Scan Report and the additional scan will be recorded. You may go through this process as many times
as necessary whenever you need to enter more than one scan for the same patient.
§ When you select New Scan Form, a blank form will appear and you are ready to enter
the next patient’s information.
Adding New Physicians/ Payers: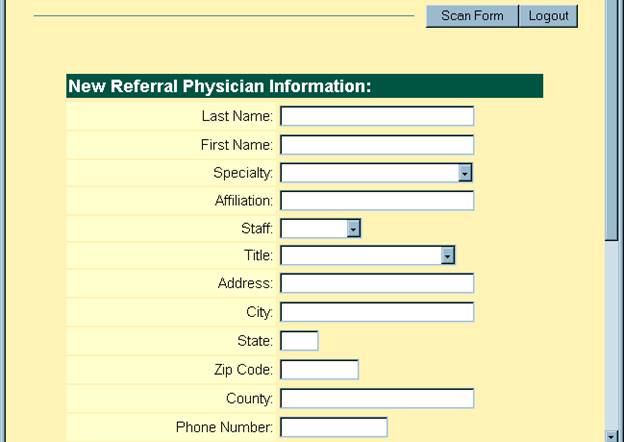
In order to
add a new physician, simply click on the “New” button beside the physician
drop-down box on the scan entry form.
The form shown above will come up asking you to add all the necessary
information regarding the new physician.
Please note that, as before, if you do not have or are unable to provide
certain information regarding a particular physician, you should choose or type
“undefined” in the appropriate cell. If
the zip code is unknown, enter 5 zeroes.
If the phone number is unknown, enter 10 zeroes. When you have completed
entry of the new physician, click on the “Add” button at the bottom of the
page. This will take you back to the
scan entry form and you may continue with the entry.
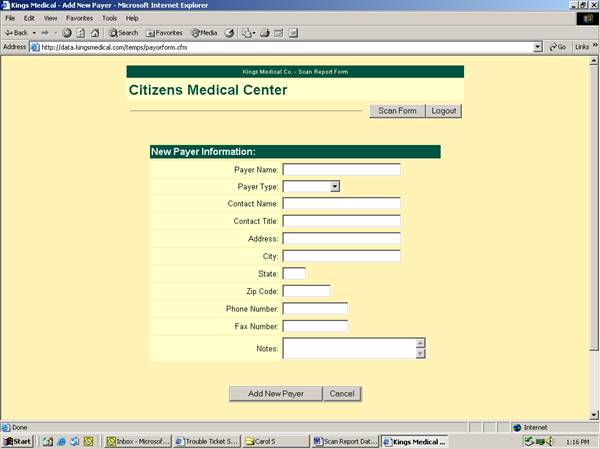
Clicking
on “New” next to the Primary Payer
field will display another page for the entry of the new payer. The only required fields are the Payer Name and Payer Type. However, if you
have additional information, fill it in as well. Then go to the bottom of the page and click
on Add New Payer. (See the following screen shot.) The scan
entry form will then reappear and you may continue with the process.
Viewing Scans:
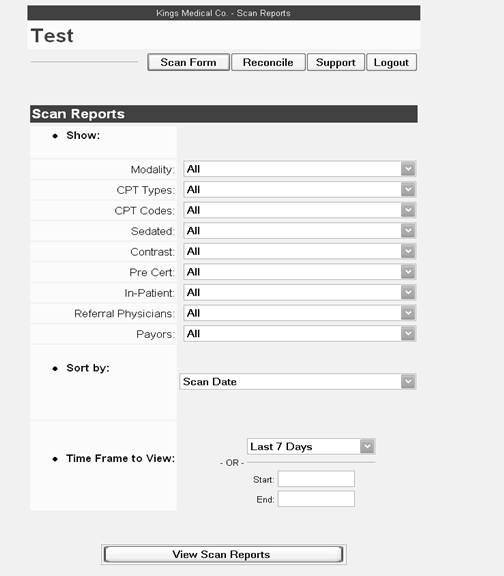
In order to view a scan for a given day, click on the “Reports” button at the top of the scan entry page. This page gives you the option of viewing scans based on multiple criteria. In order to select a particular lookup, click on the drop-down box in the “Show " section. Choose a qualifier to sort by and finally, choose the date range and click on “View Scan Reports.”
After you have reviewed the scan data and in order to return to the initial data entry form, click on the “Scan Form” button at the top of the page.
Editing Records:
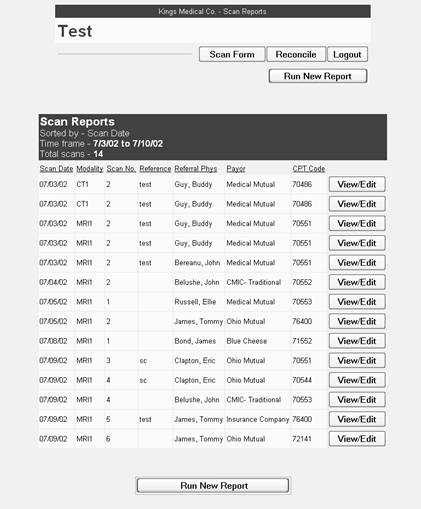
Once you have run a report and would like to verify or alter any information contained in a particular scan, click on the “View/Edit” button. This will open the desired scan and allow you to make certain changes that might be necessary.
Once the change or verification is complete, click on either “Update Report”, “Submit as New Report” or, if necessary, “Clear All.” The “Update Report” choice will allow you to make simple changes or corrections to a scan. “Submit as New Report” will allow you to use the same data but the scan will be recorded in the database as a new scan (as opposed to a scan that was simply edited). Finally, the “Clear All” choice will allow you to completely remove all data from a scan and start again. It is important however to understand that you cannot delete a scan record from the database once it has been entered. If a record needs to be removed from the database, call and ask for the Data Control Administrator at King’s Medical Group.
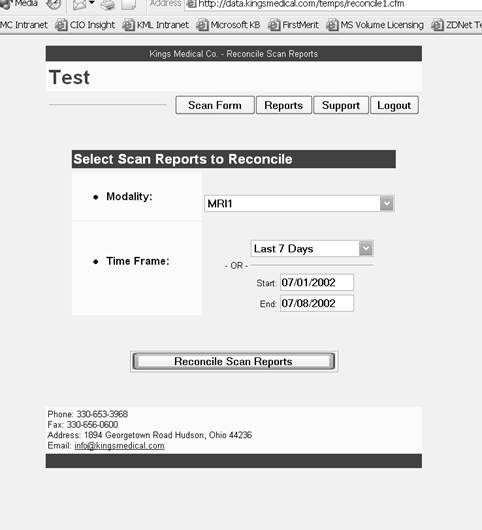
Reconciling Scan Data:
The reconcile phase is the process by which you confirm the number of scans recorded for a given time period and verify this number with Kings Medical Company. To check the scan counts, simply click on “Reconcile” on the Scan Form. Choose the modality and time frame you want to verify when the next page displays. Next click on the “Reconcile Scan Records” button at the bottom of that page. A report will run (see next page) showing the scans done during that time period.
Sending Confirmations:
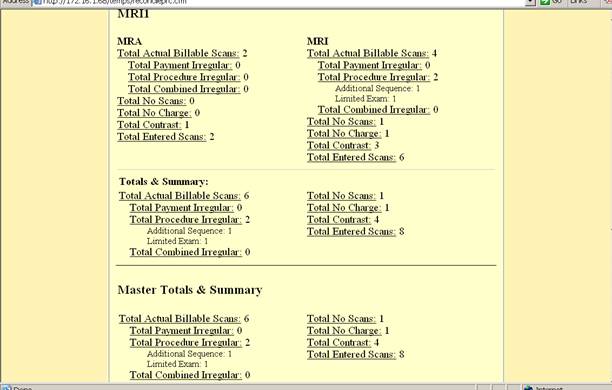
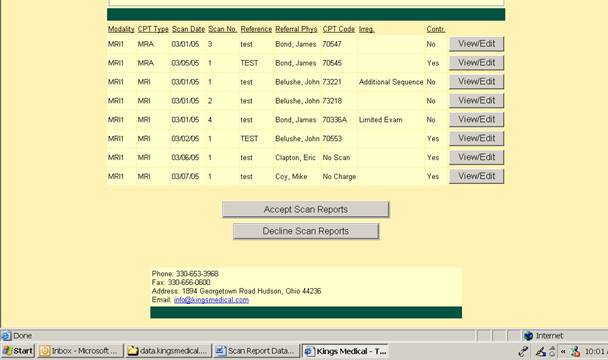
Upon reaching the final screen, the total scans for the time period you specified will be listed. Compare the list with your log sheet. If the scans listed match your records, click on the “Accept Scan Reports” button. If the scans listed do not agree with your records, you will need to determine where the discrepancy is. You may view any scan that you need to see by clicking “View/Edit”. The scan will now appear as you originally entered it. If necessary, you may make certain changes and then click on “Update Scan Report”. However, you cannot delete an entire scan. If this is necessary, call Kings Medical Group to advise us of your status. If you clicked on “Accept Scan Reports” in error, rerun the same report and this time click on the “Decline Scan Reports” button. The database will generate an email to King’s Medical Company informing us of the status. (The “Submit New Report” and “Clear All” buttons function as they do in the “Reports” “Editing of Reports” function.)
At the top of the reconciliation page is a breakout and total count of all scans entered during the specified time. Refer to the “Total Actual Billable Scans” in the “Master Totals and Summary” for a final count. That is the number that will be billed to the hospital.
Once
the “Accept Scan Report” is selected,
a warning window appears to tell you
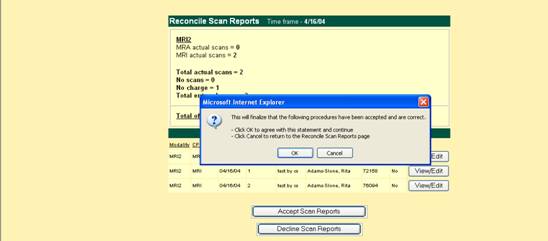
that
if you click OK, the report will be accepted.
If you click cancel, it will not.
After clicking OK, the report is reconciled and it will not be possible
for you to make any changes to any of the listed scans. (If changes become
necessary, you may call

Reconciliation should be done each day, each week and at the end of each month. Doing it daily will take less time than reviewing the entire list at the end of the month. It is a means of ensuring accuracy in reporting for billing purposes. It is imperative that the monthly reconciliation report be accurate.
Select “Reconcile” from the top of the scan entry form. On the next page, enter the Start Date and the End date. The monthly report must include all dates from the first through the last day of the month. This applies even if no scanning is done on Sundays or Saturdays.
Click on “Reconcile Scan Reports” and the month’s list of scans will appear. At this point, if you have done daily reconciliations, all the scans should have only the View button. If you have not reconciled daily, the View/Edit button will be displayed next to any scans not reconciled to this point.
Again, compare your log sheet with the list displayed on the screen and proceed by making any necessary corrections or by accepting the reconciliation if the list is correct.
The monthly report should be completed within two business days after the last day of any given month.
If you merely wish to view the list, you may return to the top of the page and make another selection.
In order to exit the database, simply click on the “Logout” button and close your browser.
Support
For any additional Help please contact your King’s Medical Company Business development manager or by clicking the support button and selecting Email. Email Your Questions to Support Staff using the support page shown.